**Please be aware that what you see below is a rough first draft of my bike building process. I leave it here as testament to how much I’ve learned and how far I’ve come, and how far there is still to go. For a more developed look at what I do in this space, please see my more recent work with bikes.**
I learned how to build bike frames when I worked for Pete Olivetti, a custom bike frame builder in Boulder, CO. While I was there, I got to use his professional-level tools to build my first bike frame. I was hooked. When I returned home, I began to build out my garage so that I could build my own bike frames here in Salt Lake City.
I had a 1987 Specialized Rockhopper that I was using as a commute bike, but it didn’t fit me very well and I didn’t like that it didn’t have disc brakes. I figured this was a good bike to replace for those reasons, and because it seemed like a low consequence option for the first bike built entirely by me with my own tools.
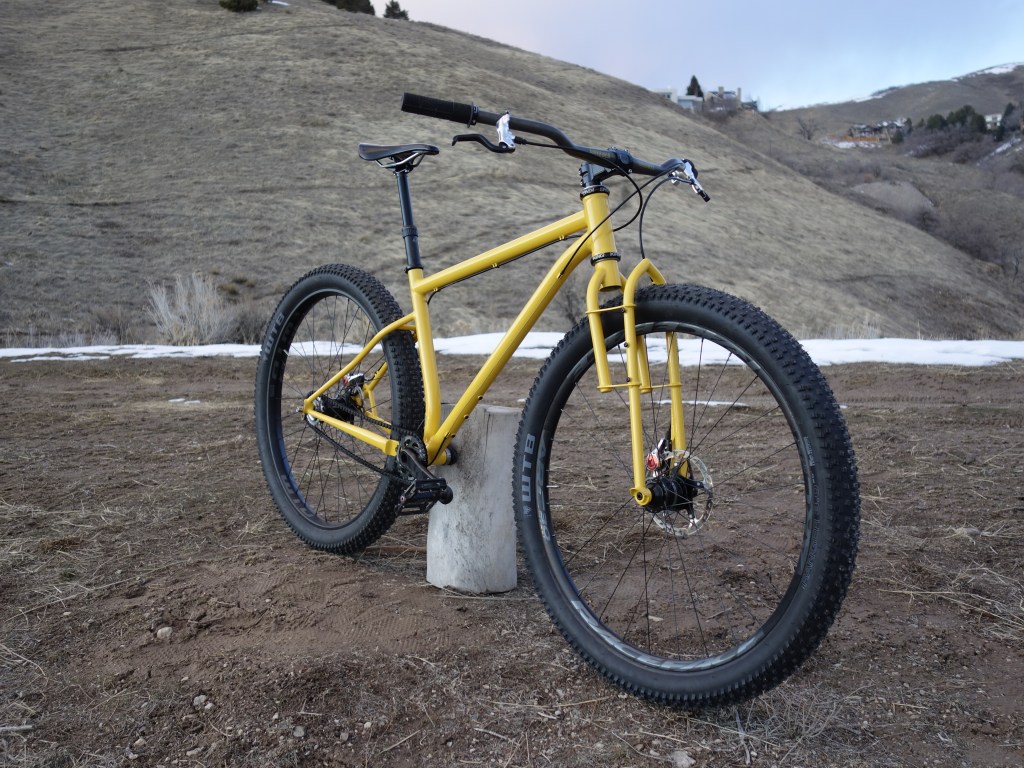
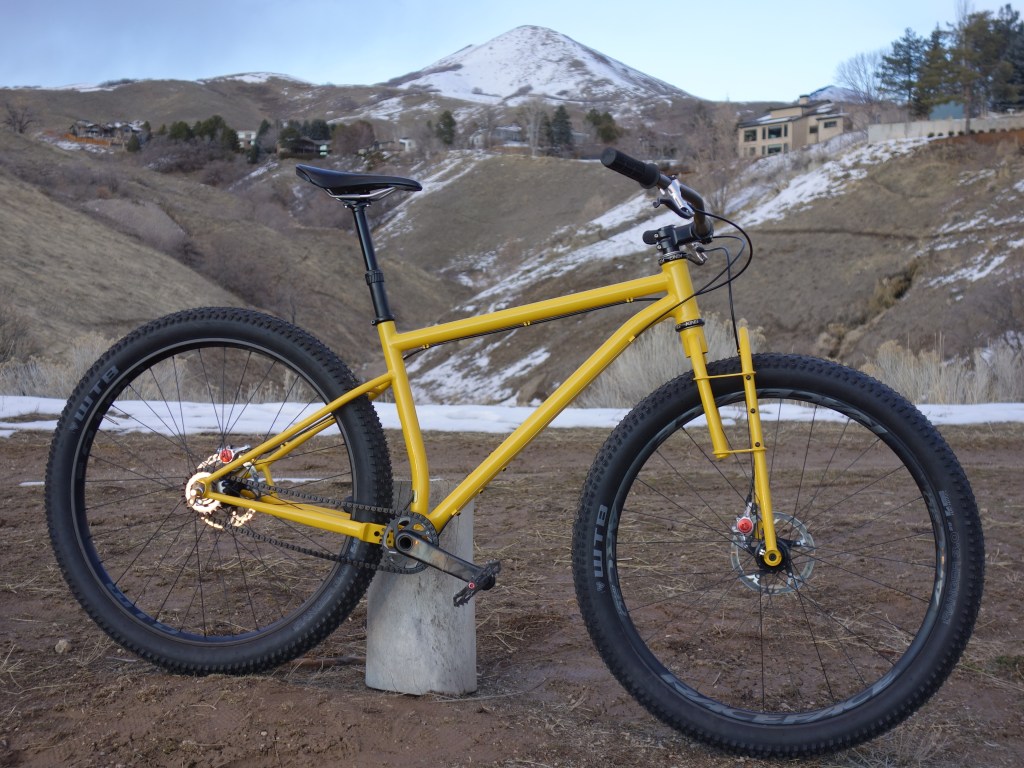
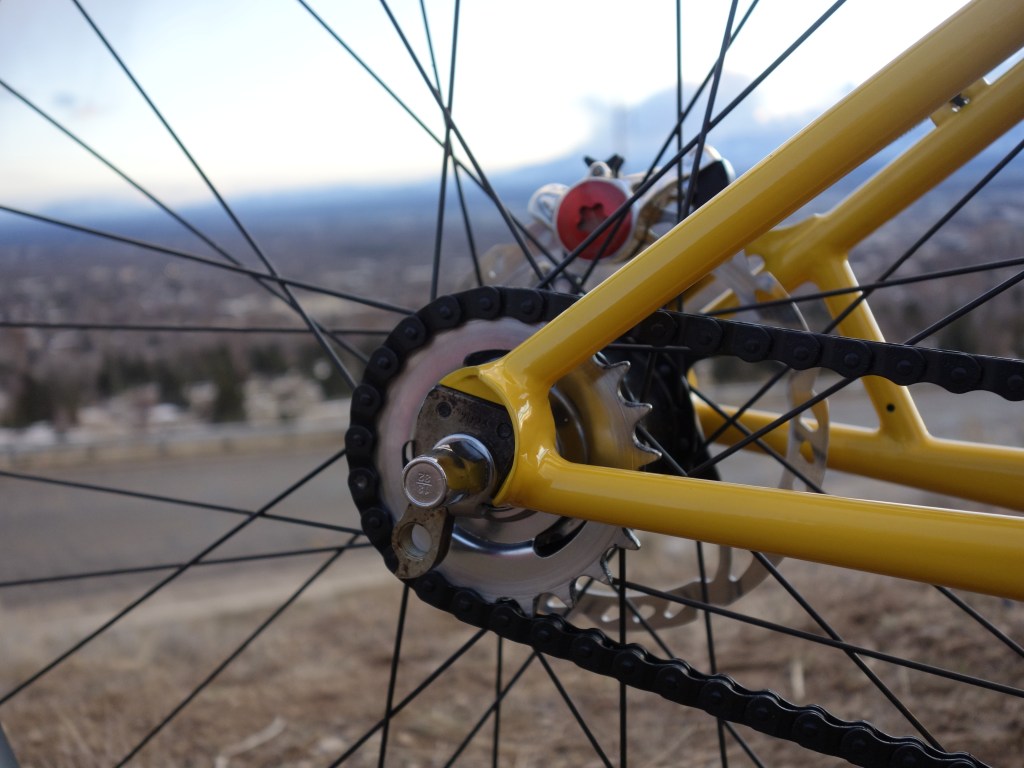
I wanted to retain some of the character of the Rockhopper in my new bike, so I set out to design what I would consider a “modern klunker.” Namely, I wanted to use 29+ wheels and tires, have wide, cruiser-like handlebars, a dropper seat post, and a Sturmey Archer 2 speed kick-back hub. Pete had just built a bike for Grinduro that had a bent down tube that I really liked, so I incorporated that element into my design too.
Geometrically, I wanted to make the bike a bit more like a modern mountain bike. More than anything I wanted it to feel smooth both on the road and on trails. Because I was planning on using a rigid fork, in my mind those conditions meant a front center in the neighborhood of 700mm, a mechanical trail between 85 and 90mm, and a chainstay length around 435mm. I knew I wanted to have a custom fork made, so this meant I had complete freedom over the steering geometry. Here’s what I came up with:

A lot of the geometric intuition for this bike came from comparing bikes that I’ve ridden and liked and then dissecting and combining various geometry elements into one. As an aside, I like drawing my bikes in Solidworks. Though I didn’t use it here, I really like the freedom and control it affords over a program like BikeCad.
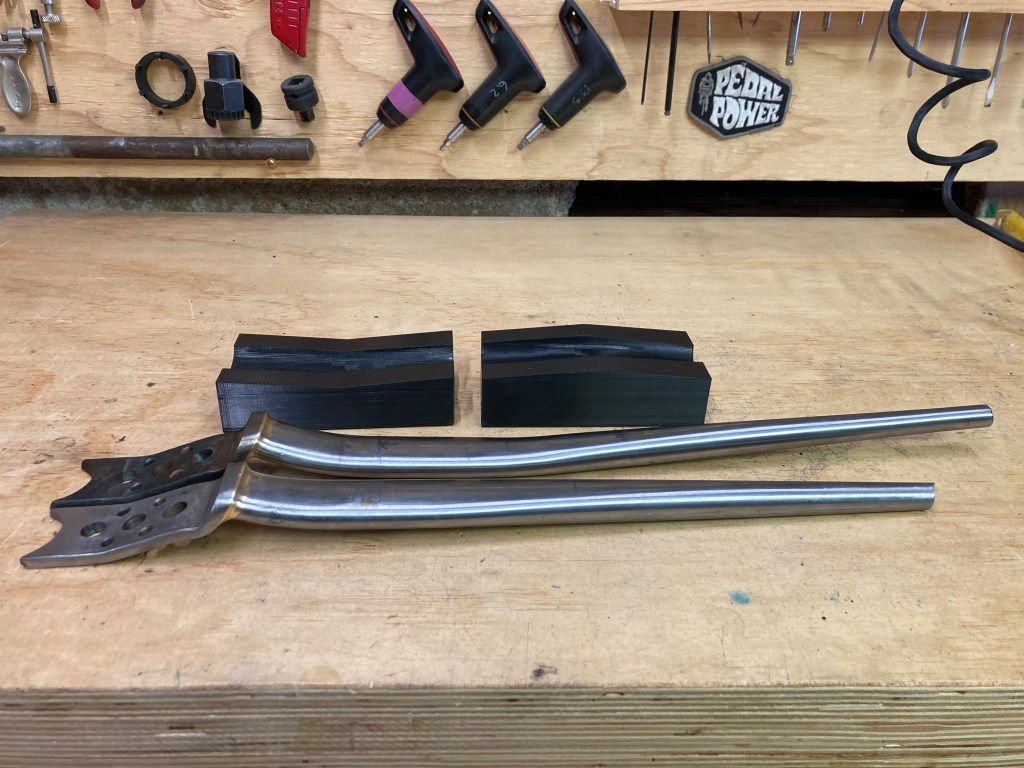
Once I had the drawing nailed down, it was time to begin fabrication. I used half round hand files in bastard and second cut to make all of the miters on this bike. My process for the front triangle was to record the miter angle for a given joint, input that angle into tubemiter.exe, print and cut out a paper template of the miter shape, transfer the shape to the tube with a sharpie, and start filing.

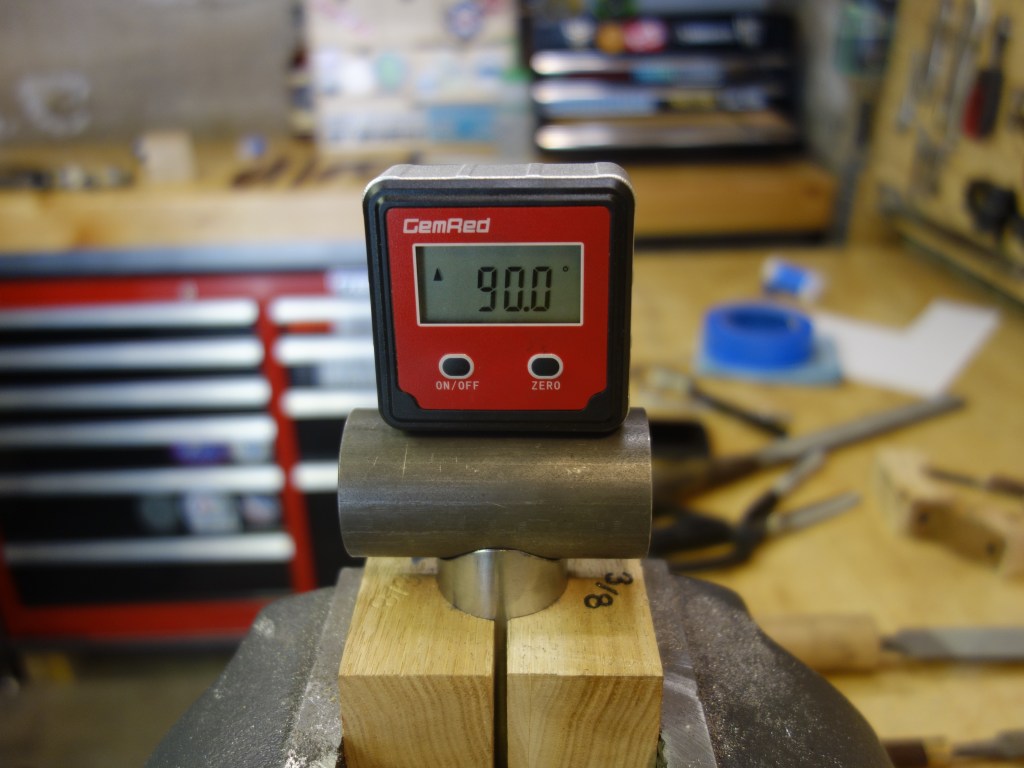
When the first end of a tube was done, I would place the tube on a surface plate (in my case a blanchard ground table saw table), press the tube against a back stop, and measure from the “throat” of the miter to where my next miter should be placed. I scribed the centerline on all of the tubes prior to cutting so that I could ensure that all of the miters were phased properly. Once the cut location was marked, I would repeat the same procedure above for filing the joint.
Refining the miters and cutting the tubes to length was a bit of an iterative process, with my frame fixture as the target for my actual geometry. By this I mean that I set up the frame fixture according to my measurements from my solidworks drawing to the best of my ability. Unfortunately, my fixture is both extremely difficult to set up, and it is not particularly repeatable. This combination does not lend it to being setup more than one time for the same bike, so for this bike I set it up as close to the drawing as I could, and I left it that way until the bike was done. I would use this setup, which was close to but not a perfect 100% match of my drawing, as my reference when cutting and mitering tubes. Someday I hope to buy a professional fixture so that this problem can be avoided.

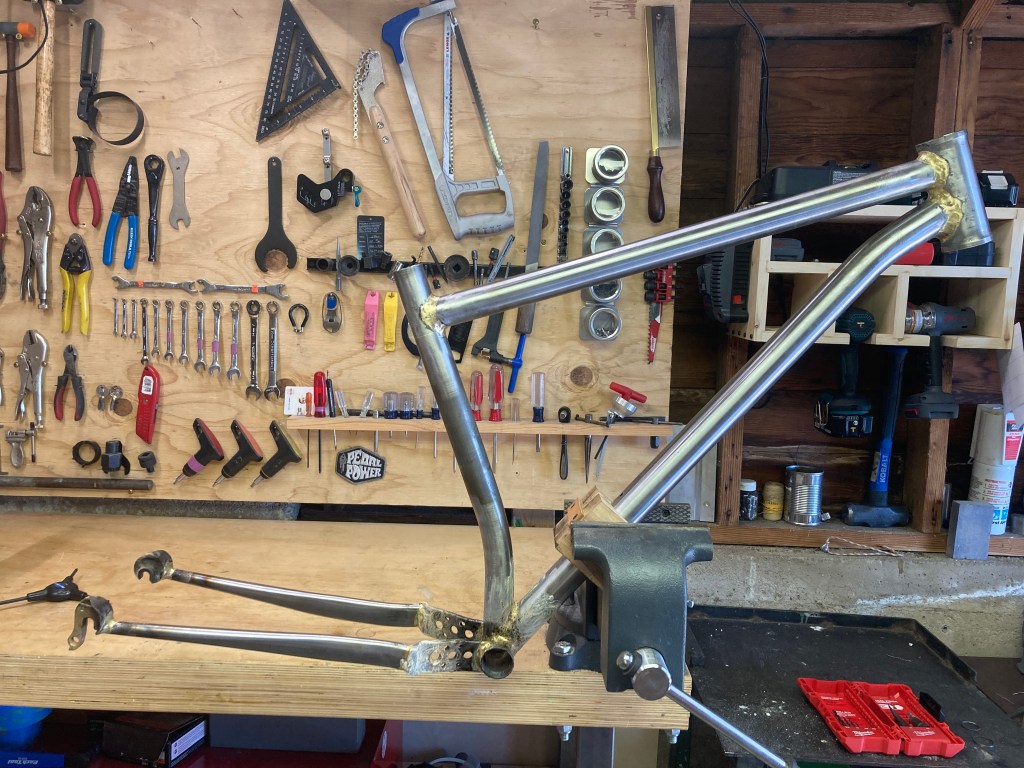
My fixture only allows for one half of the bike to be set on it at a time. I started with the front triangle because it is a bit easier than the rear triangle. I mitered all of the tubes, then I tacked them in place, and brazed them with Cycle Design Low-Fuming Bronze and Cycle Design Low Fuming Bronze Flux. I tend to prefer a 1/16″ rod for tacking and a 3/32″ rod for making fillets.
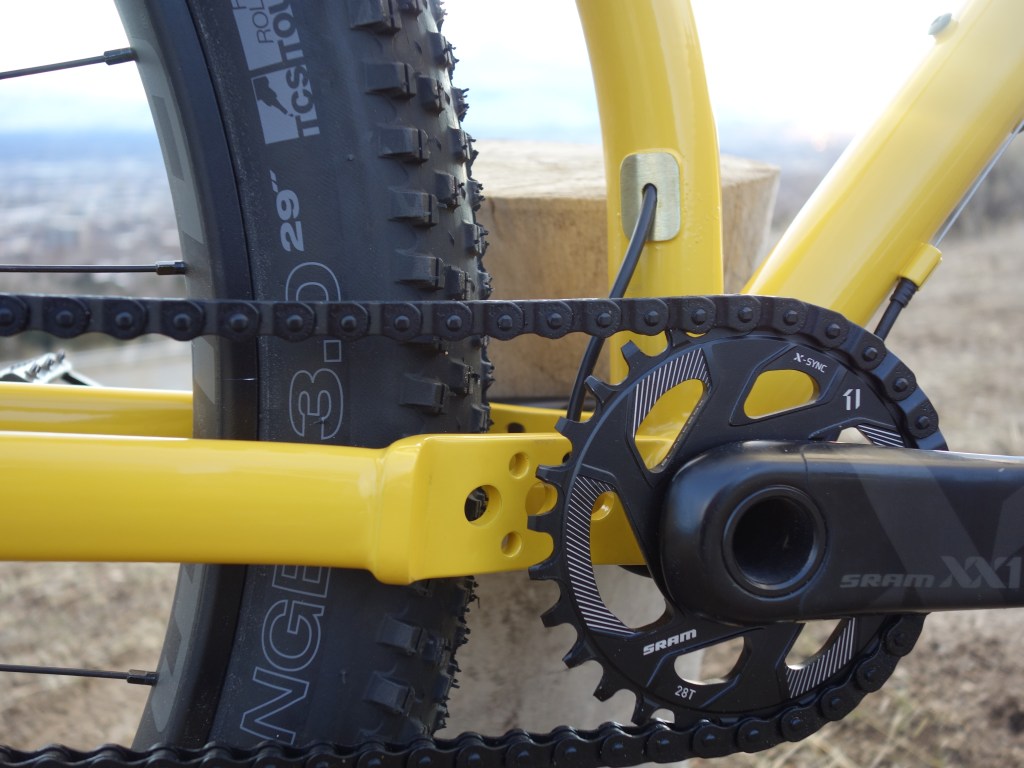
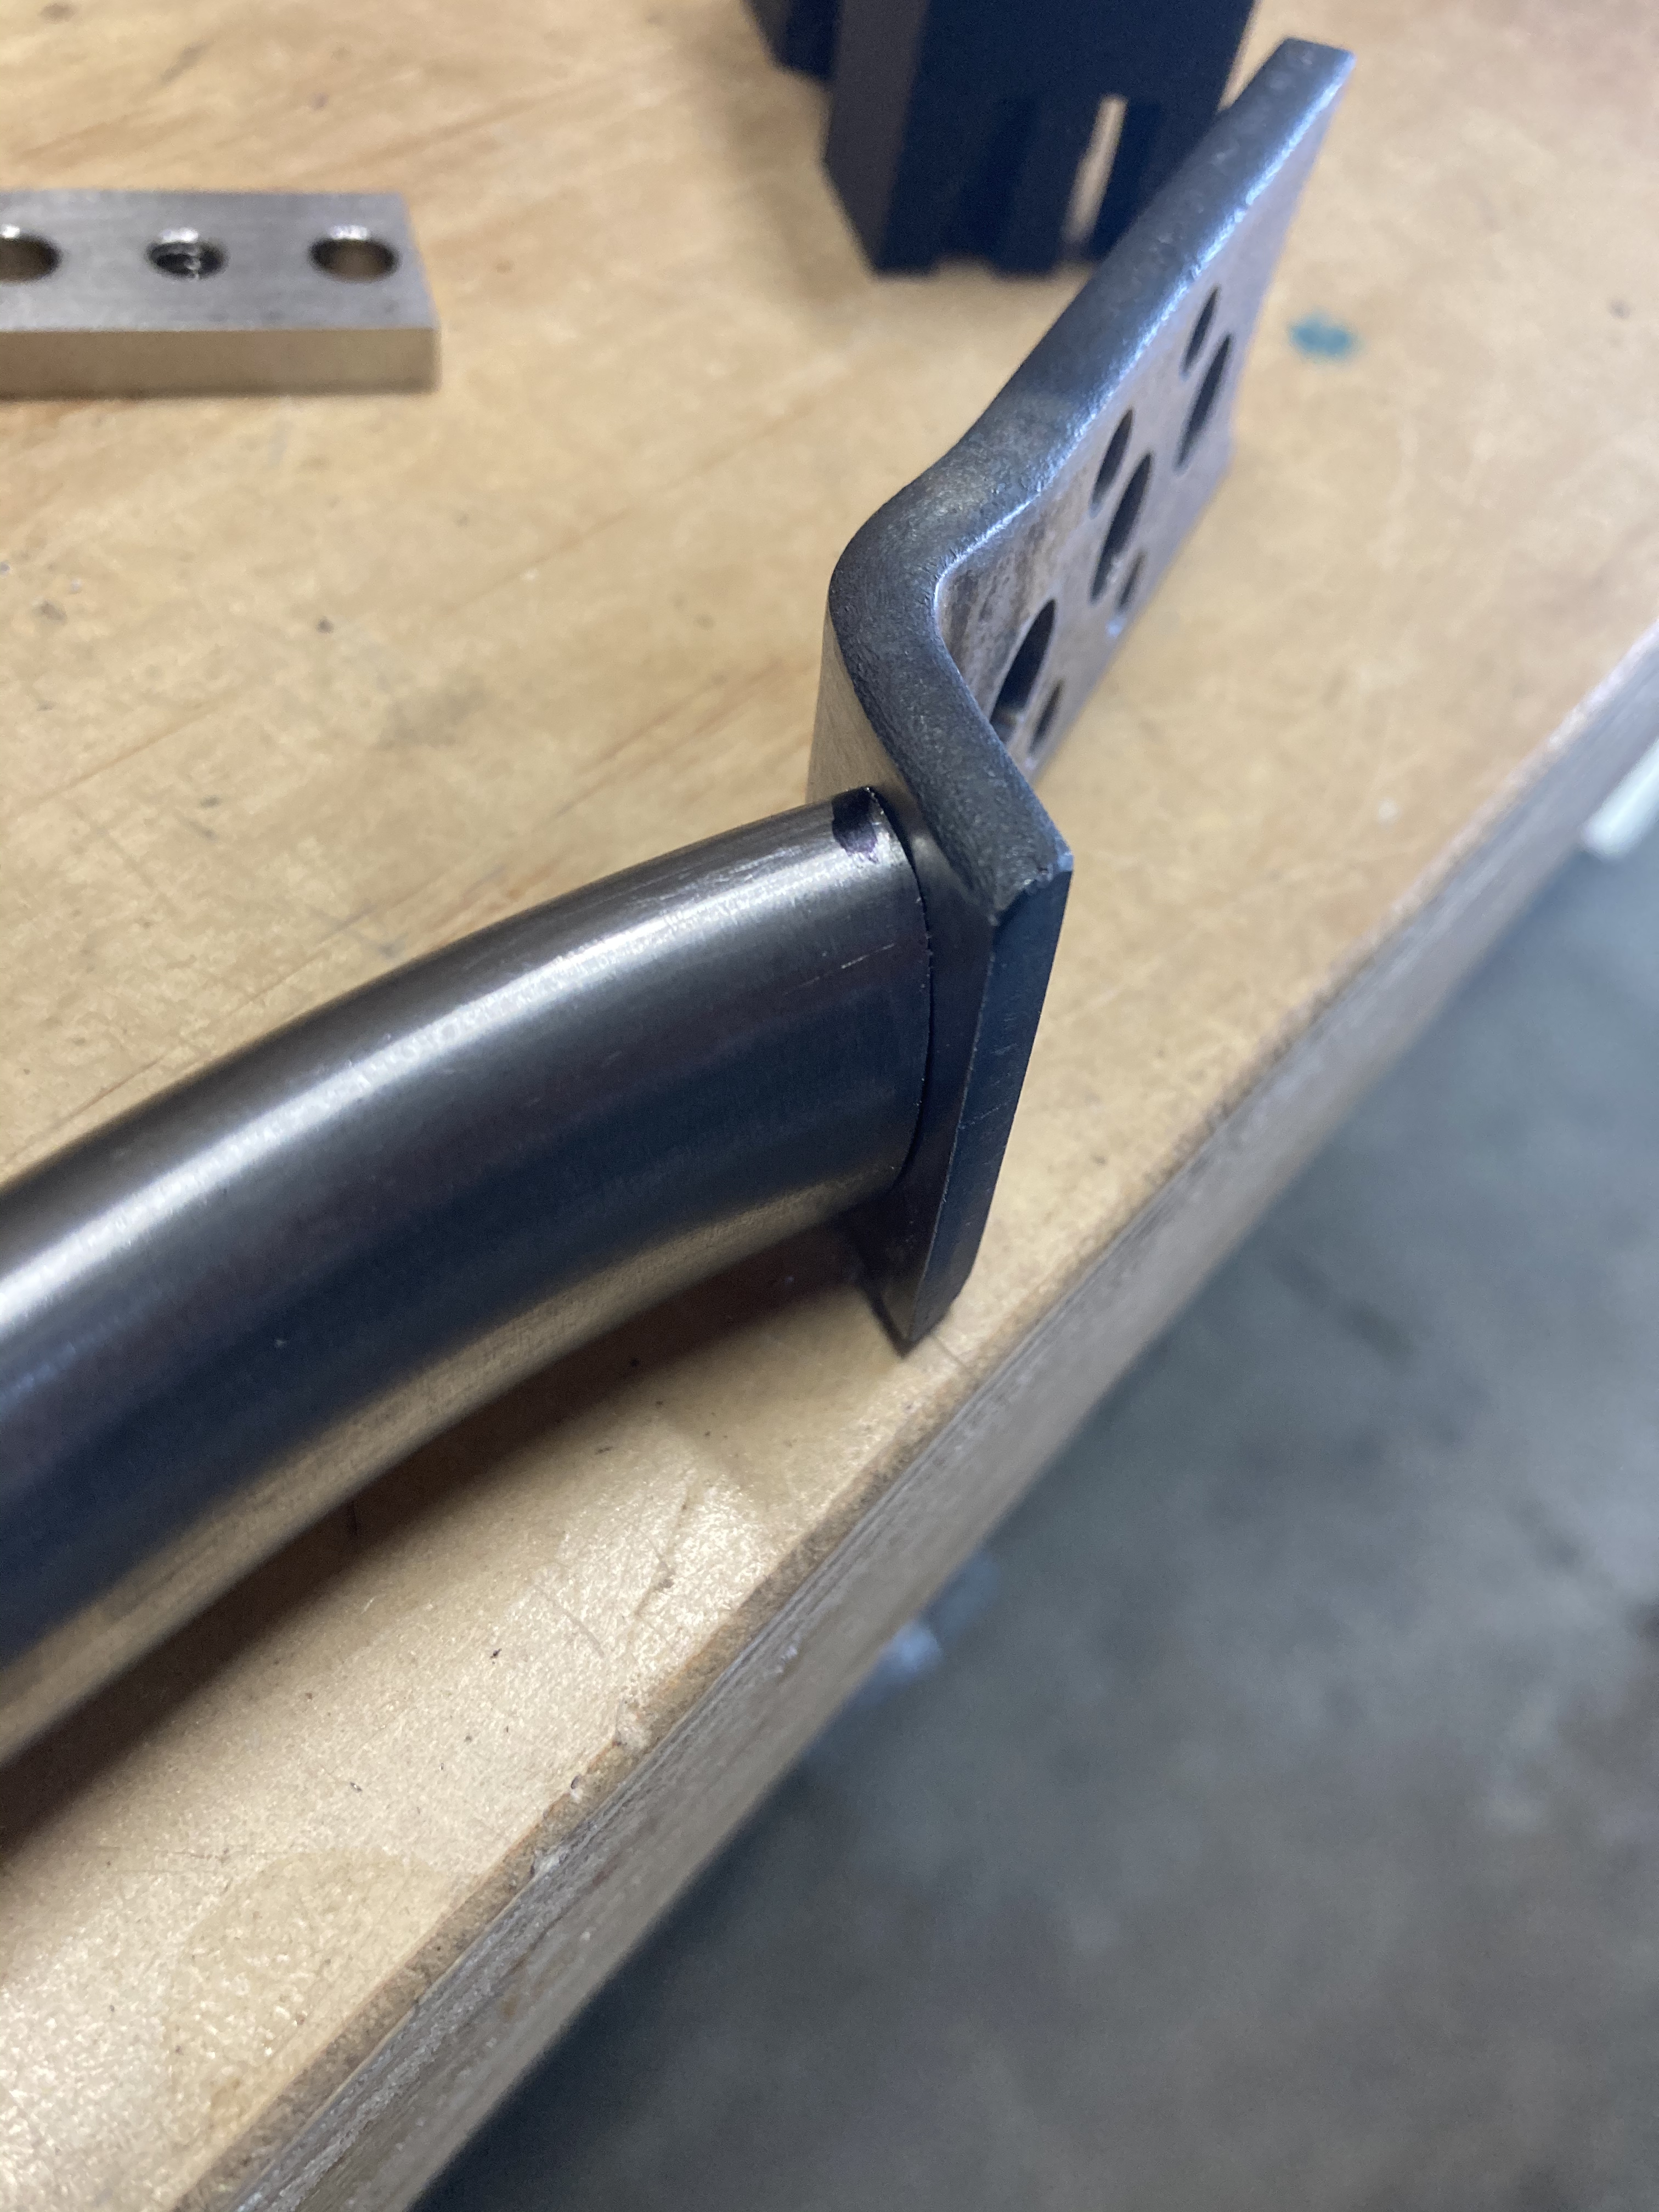
Once the front triangle was done, I set out making the rear triangle. Since I was using 29×3.0 tires and somewhat short chainstays, the area around the bottom bracket and chain ring was fairly crowded. To be able to fit a chainstay in the narrow gap between the tire and the chain ring, I had to use some kind of yoke. I came up with the following design, loosely based on others that I had seen:
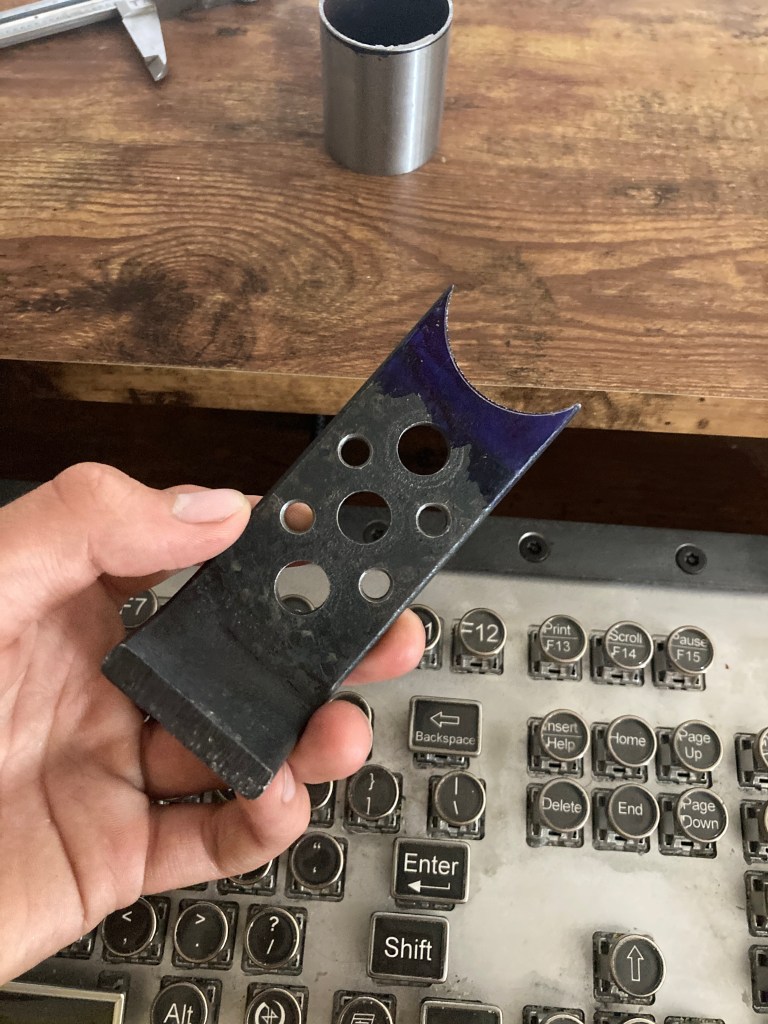
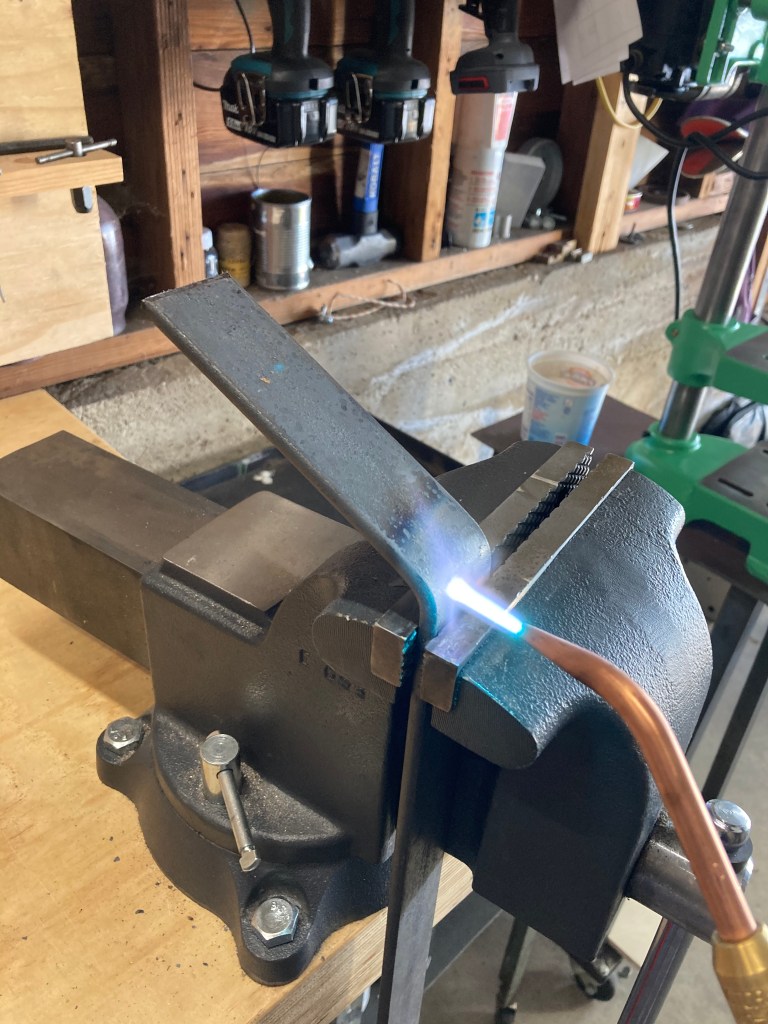
I made the yokes with 1/4″x1 1/2″ 1018 steel plate. I laid out the hole locations with Dykem and some dial calipers, and then I drilled them with my drill press. I then marked the bend lines and bent the yoke into shape in my bench vise, with the help of my torch. There were three bends per yoke. Then, I mitered and brazed the chainstays to the yokes.
Due to the somewhat primitive nature of bending the yokes, it was almost inevitable that they wouldn’t be identical. They weren’t. I was afraid that the non-drive side chain stay would interfere with the crank arm clearance, so I had to come up with a way to bend either the yoke or the stay. Bending the yokes used a lot of gas in my torch, and I was a little leery of annealing them too much, so I chose to bend the stay.
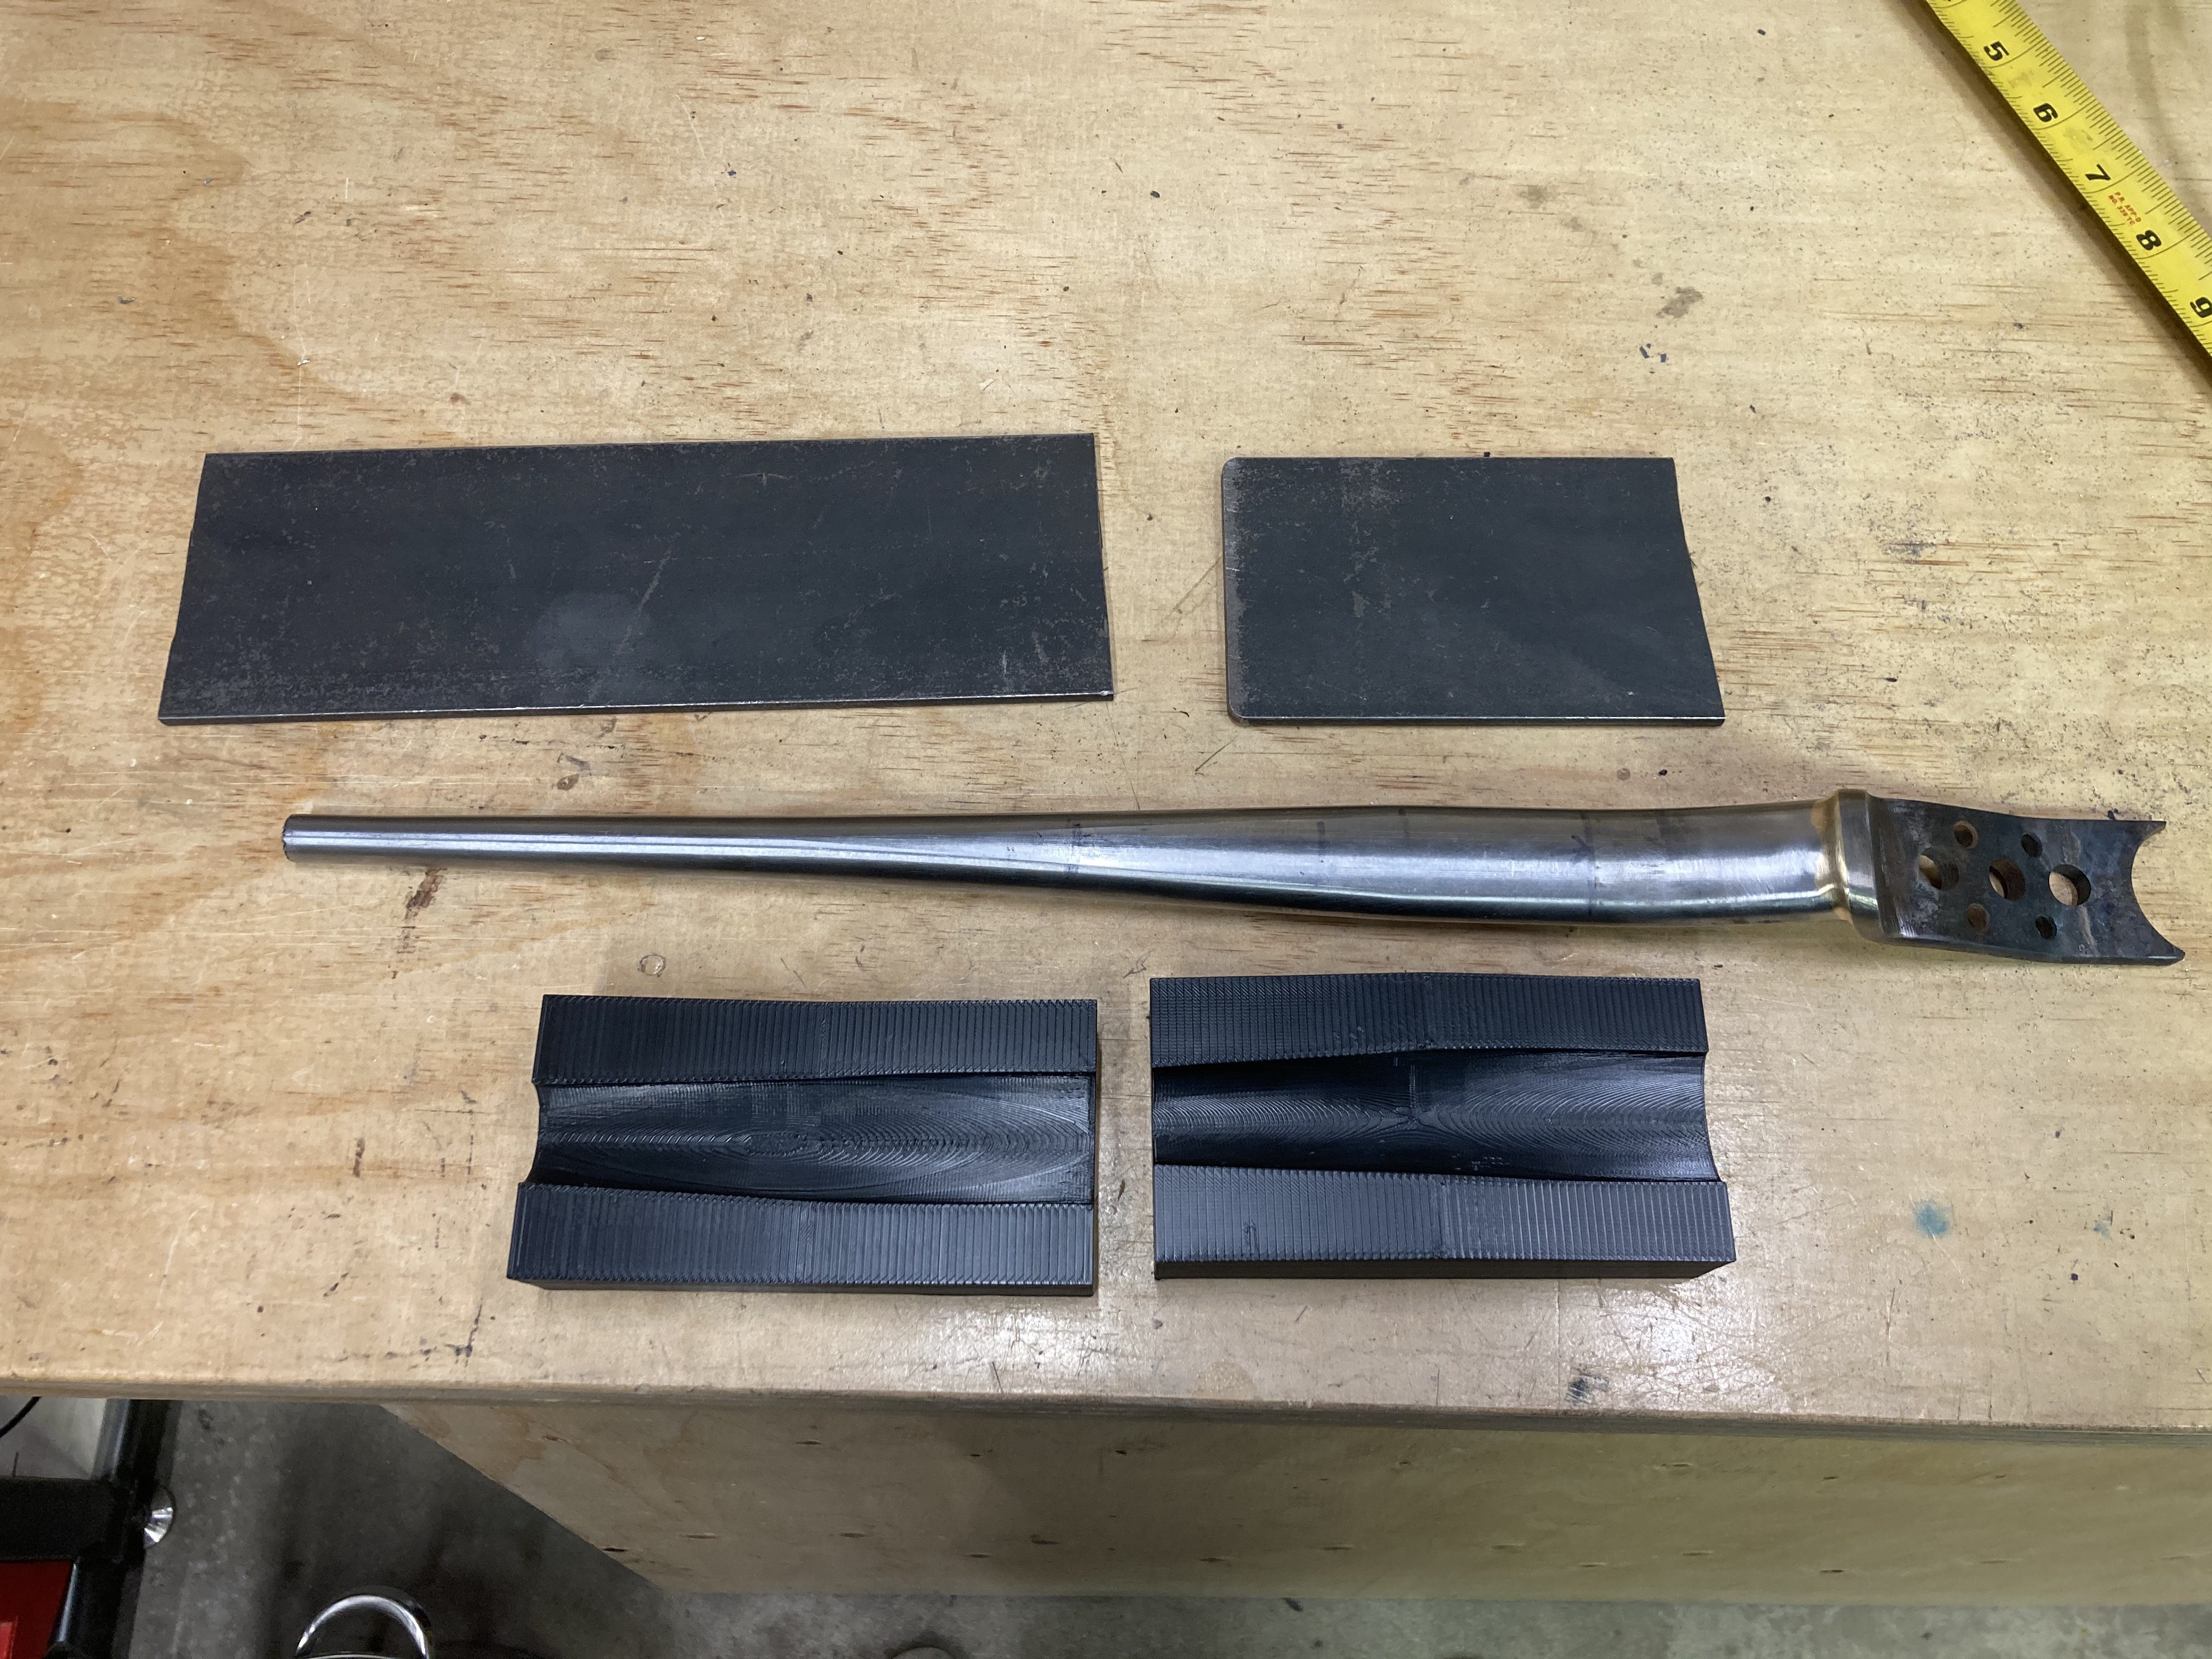
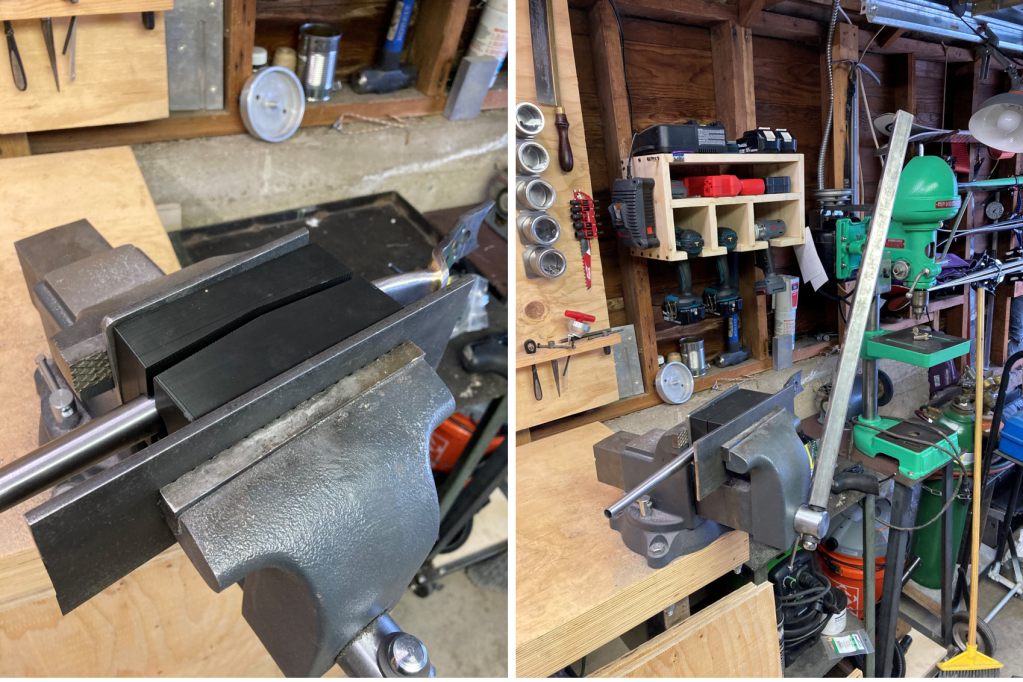
The chain stays on this bike are tapered and swaged, meaning that they have a complicated cross section and are not easy to bend with traditional tools. To get around this, I carefully laid out a datum on the chain stay, and made precise measurements of the profile of the tube. I then put these measurements into solidworks and made a bending die to change the angle of the stay by 5 degrees. I printed this bending die on my Creality Ender 3 3D printer with eSun PLA+ filament. I sandwiched the stay in the blocks of the die, and the die in some steel plates, and I put the whole assembly in my vise. I cranked down on the vise and the bend worked perfectly.
I mitered the chain stays with half round hand files, but this time I only used the fixture as my reference. The compound nature of the miter meeting the dropout off center was simply too complicated to measure accurately with my tools, so I didn’t. I simply took material off, little by little, until the chain stays fit perfectly. Then I brazed them into place. A quick check with the rear wheel showed that the dropouts were perfectly straight. Success!
Next, I got to work on the seat stays. I made another bending die with my 3D printer, similar to the one for the chain stays. This allowed me to get a bend profile that wrapped around the 3.0″ tire a little better. I marked the bend centerlines on each tube and cut them both approximately to length. Then, I mitered the dropout side of the tube. Once I had this fairly close, I began to miter the seat tube side, which is without a doubt the most complicated miter of the entire bike. At this point, I knew I was going to use a Deathsplosion fork from Blacksheep bikes, which has a bit of a segmented look to it. I figured that if I had the seat stays intersect the seat tube a fair bit below the top tube, the overall look of the bike might have a symmetry between front and rear. I went with it and mitered the tube and brazed it in place. I’m glad I did it that way, I really like the look.
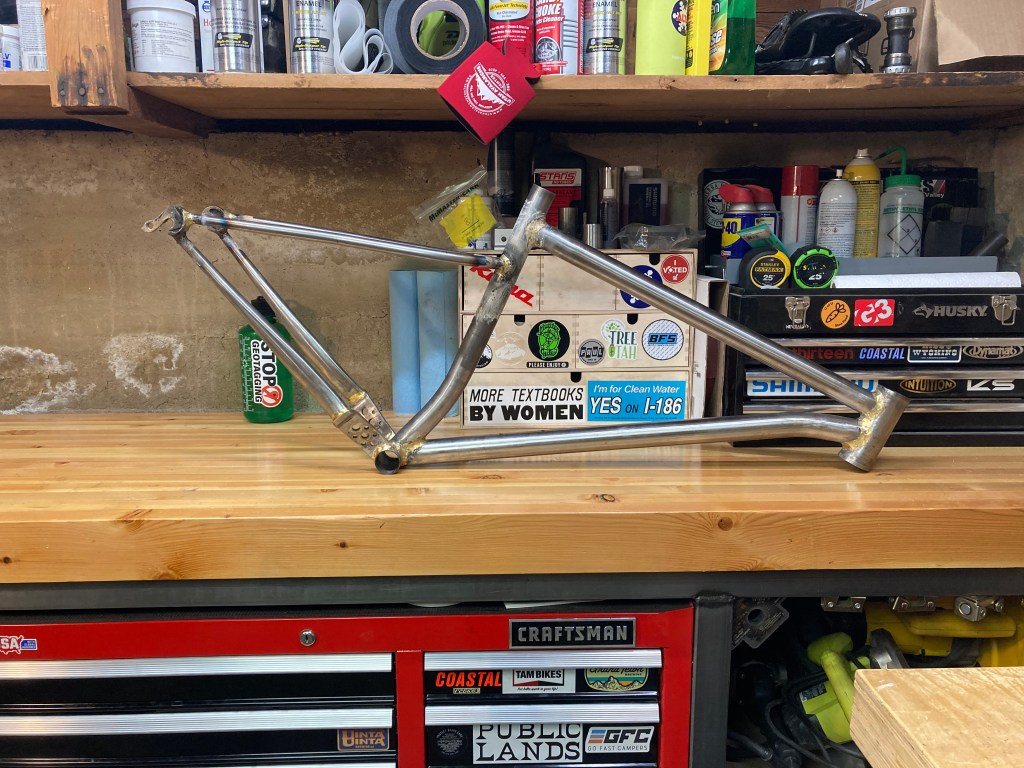
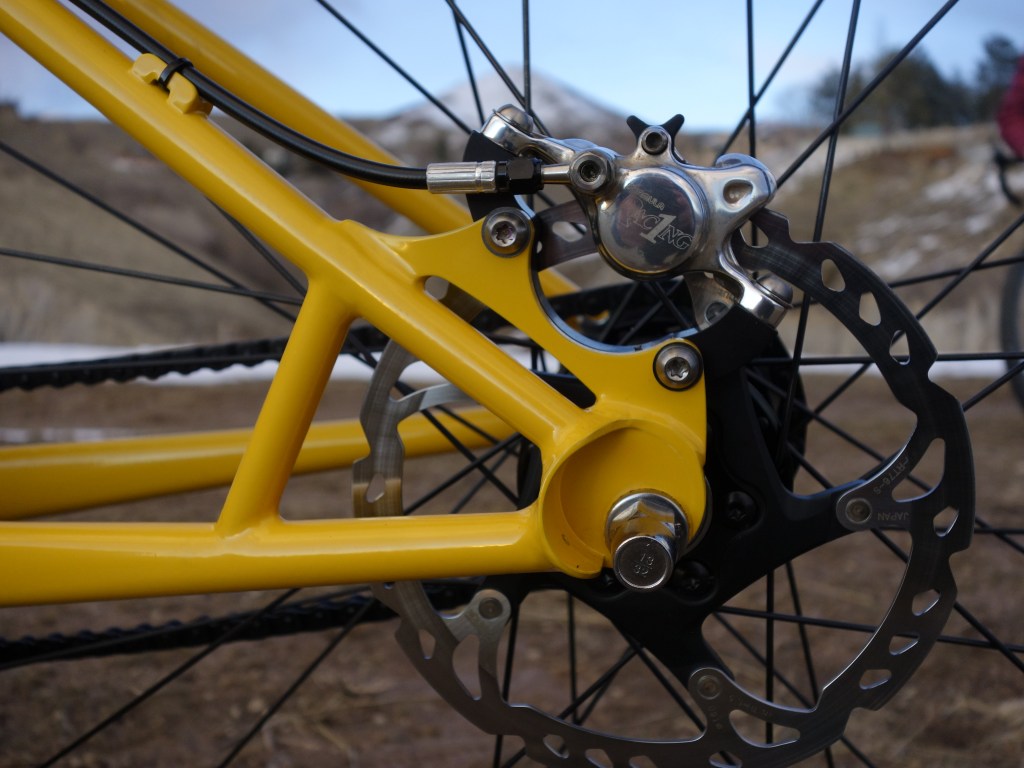
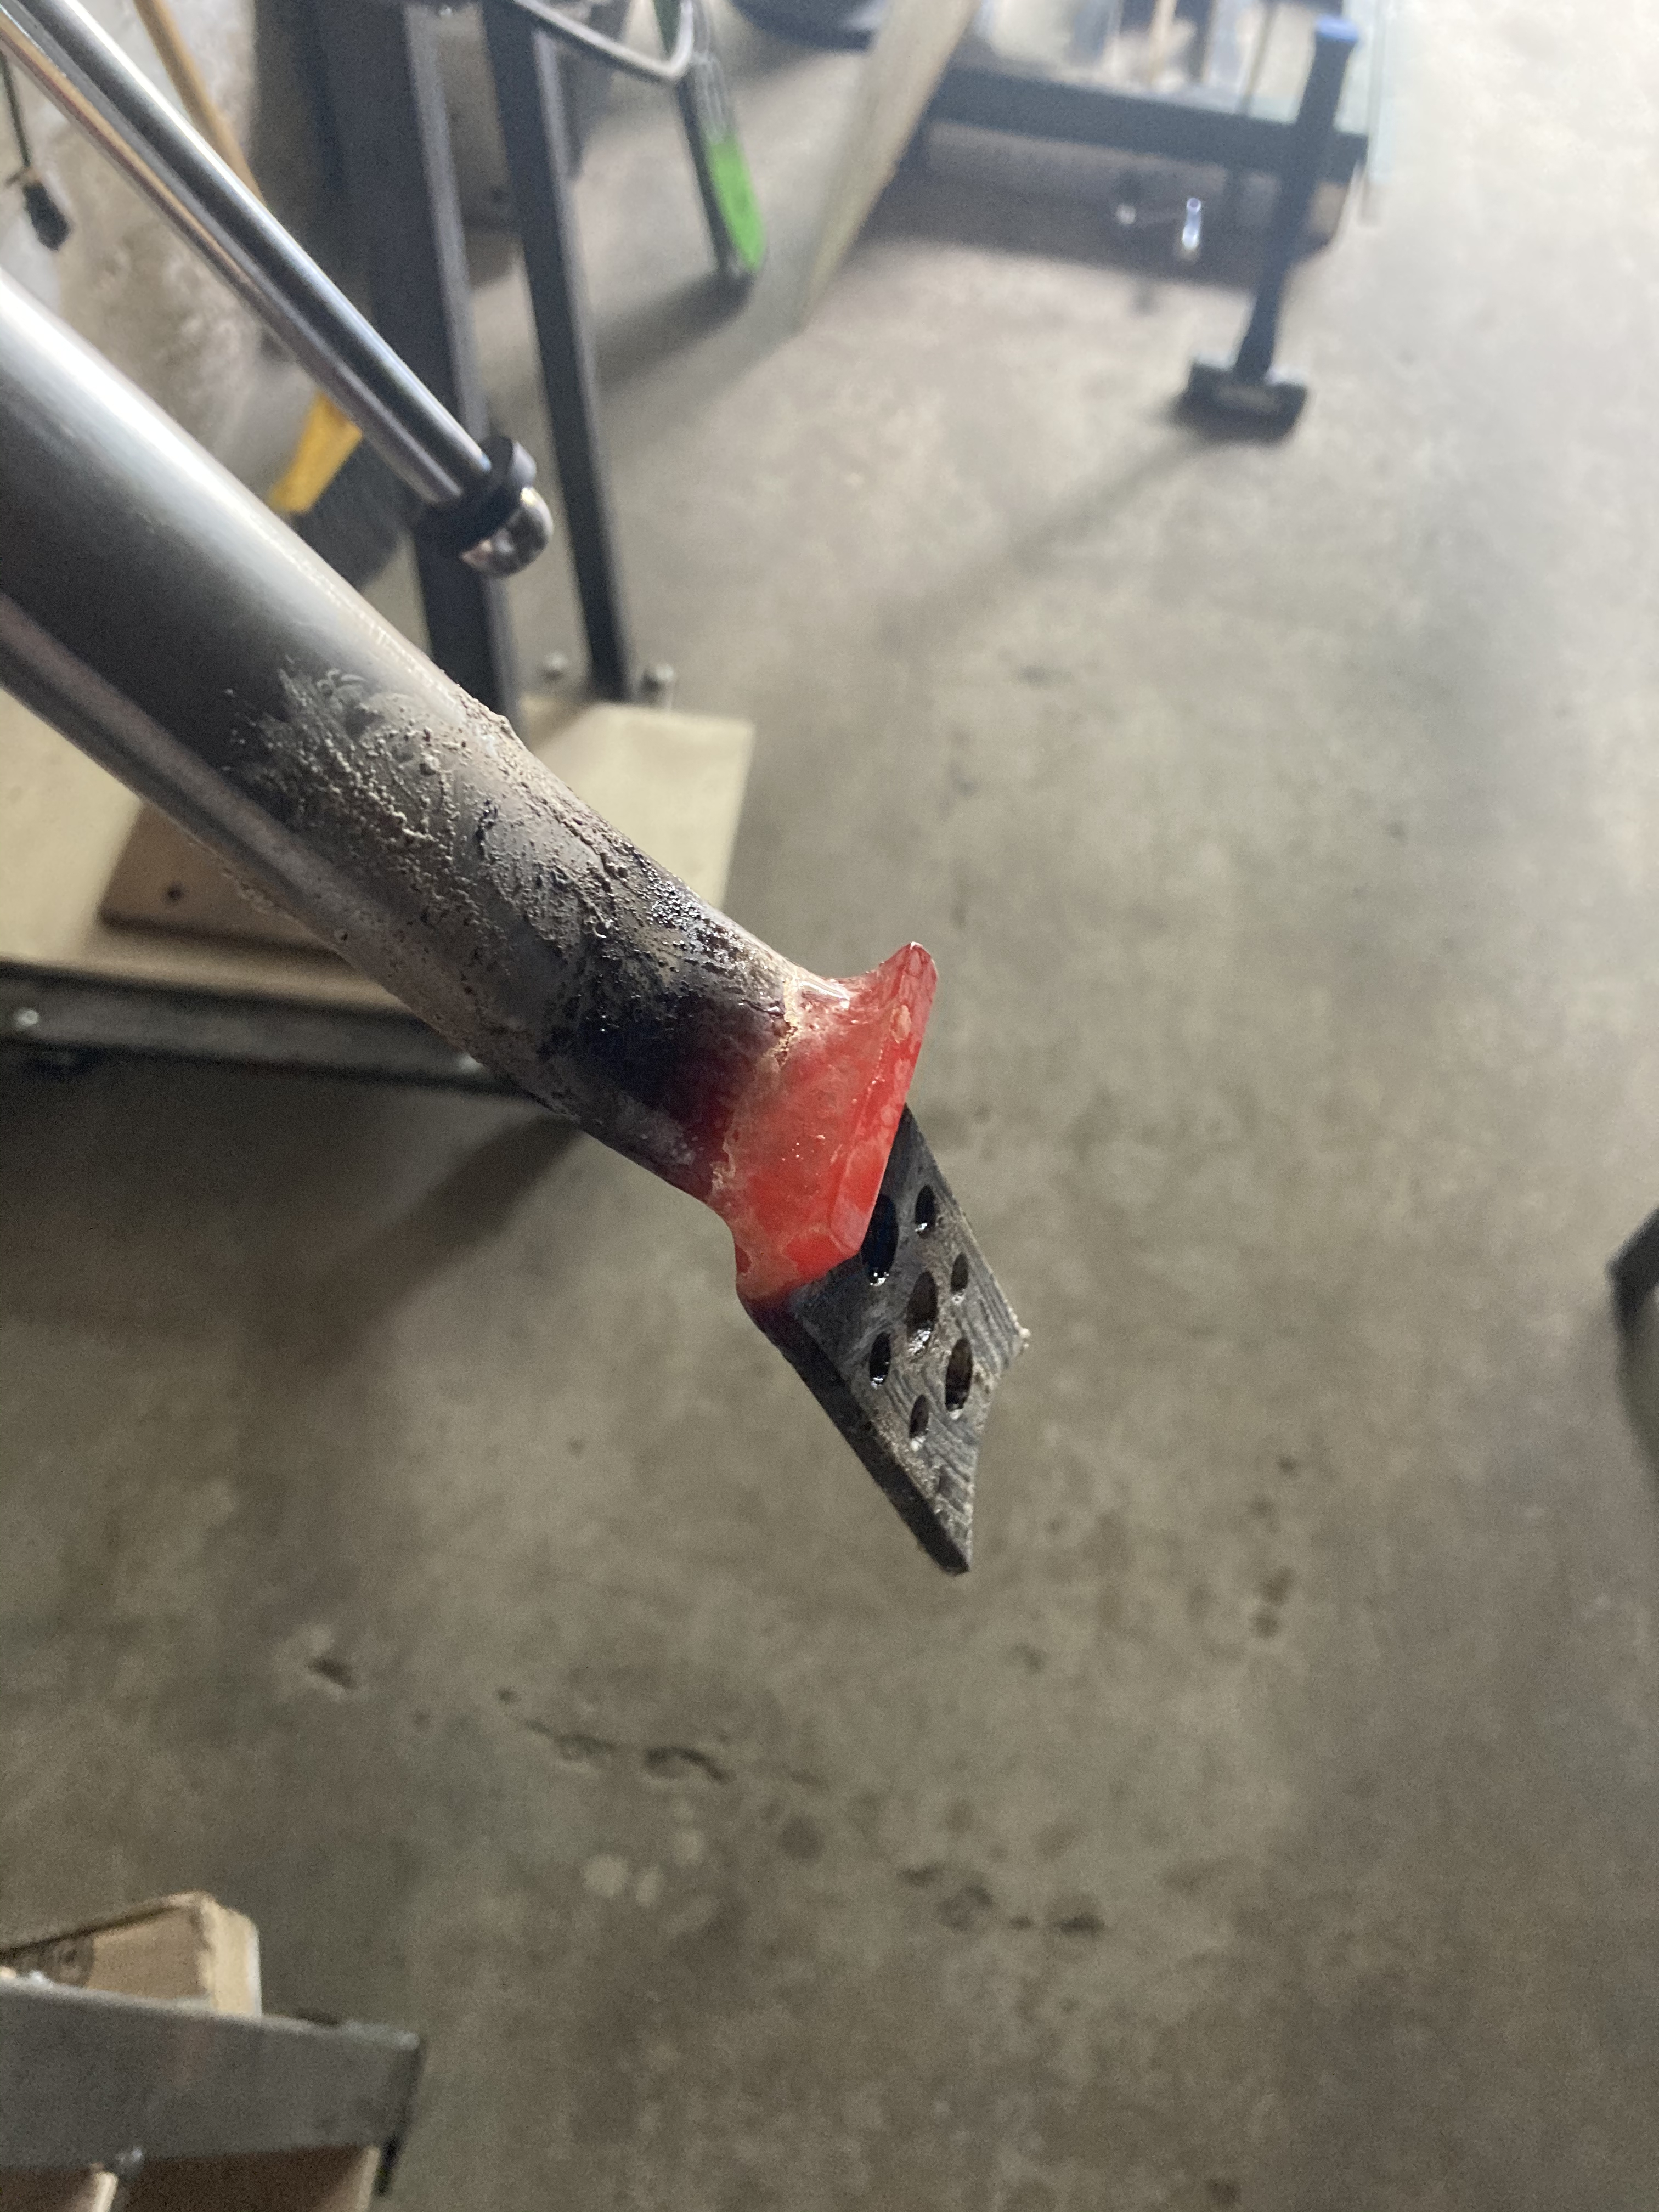
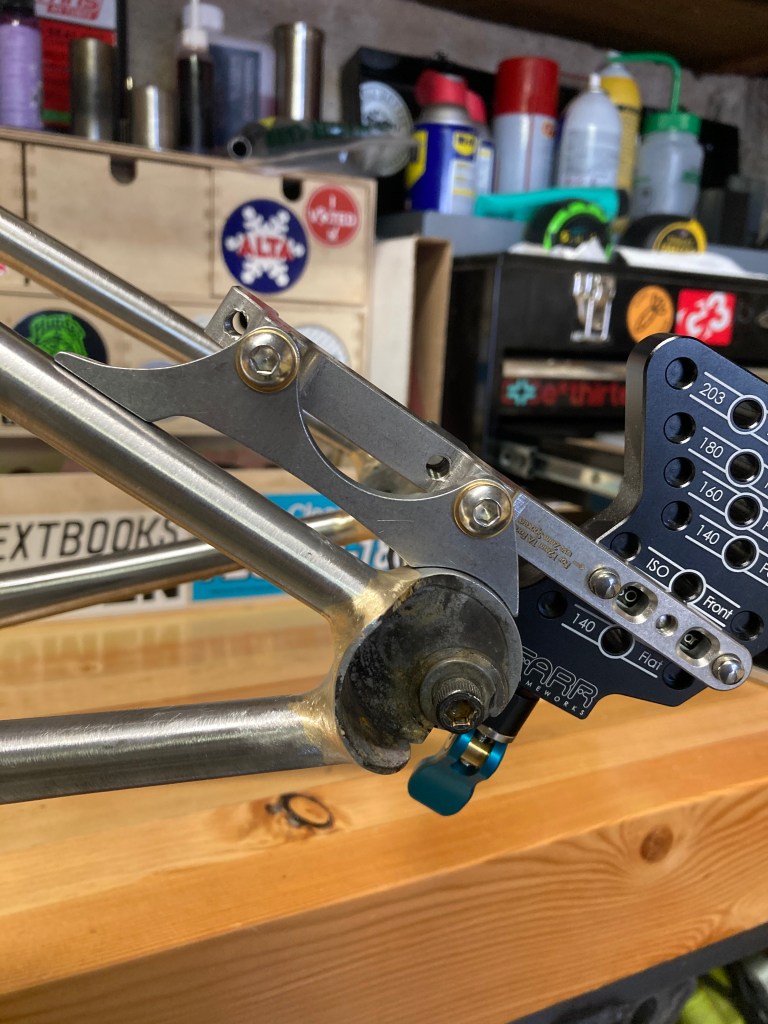
Finally, it was time to put the brake mount and seat stay bridge on, and take care of all of the braze-ons. I used a Paragon Machine Works ISO disc adapter because when I worked there, I designed this very part. This was beyond satisfying. I used a Farr Frameworks Le Disco tool to both outline where to cut the disc mount and to hold it in the right place when brazing it to the frame. The tool is great and Todd Farr is awesome, I’m really glad I bought it. Then, I mitered and brazed the seat stay bridge and the brake reinforcement in. Finally, I silver-brazed the water bottle bosses and cable guides into place.
As my finishing touch, I gave the bike a nameplate. It’s called “Hayseed” cause that’s what it is: unsophisticated, simple, delightful.
I took it to a local shop and had it powdercoated in sunflower yellow. Matt Nelson of SaltAir Cycles very generously helped me out with facing the head tube and bottom bracket, chasing the bottom bracket, and reaming the seat tube. I am very grateful for his help in this project. When all of this was done, I built it up and took it for a ride. It’s exactly what I wanted it to be and it was damn hard to wipe the smile from my face. I love it.